Showing posts with label Cookies. Show all posts

Tuesday, December 9, 2014

White Chocolate Dipped Cherry Shortbread

Before we moved to Minnesota I spent an agonizing amount of time imagining who my new friends would be. Would I even have new friends? What would they look like?  Could they ever compare to and replace the friends I was leaving behind?  The answer is yes.  And no.  Just as I've learned that I love my children fully, equally and differently...I love and adore my new friends fully, equally and differently.  These women who invited me to join their lives, their play groups, book clubs and social events have completed my circle here.   I adore them, I adore their children, I adore how fully full they've made my life these past six months.  Blessed is the word that constantly comes to mind.


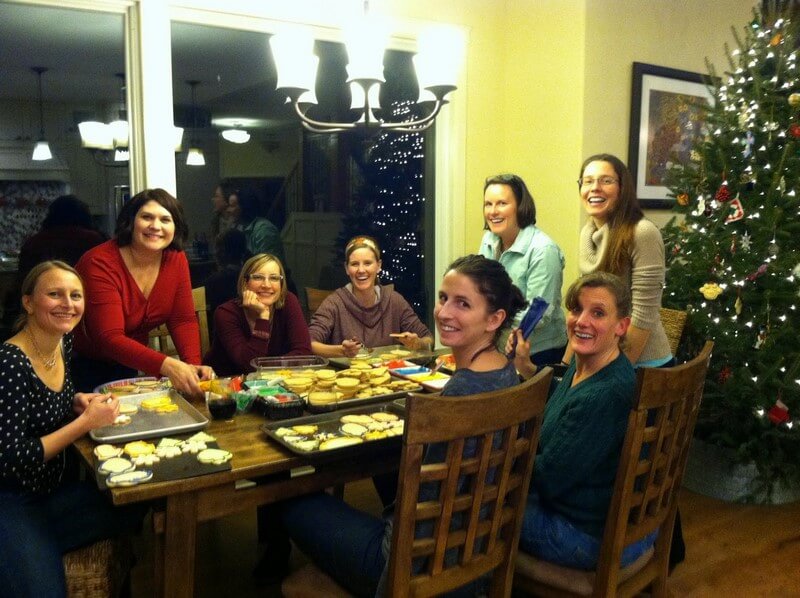
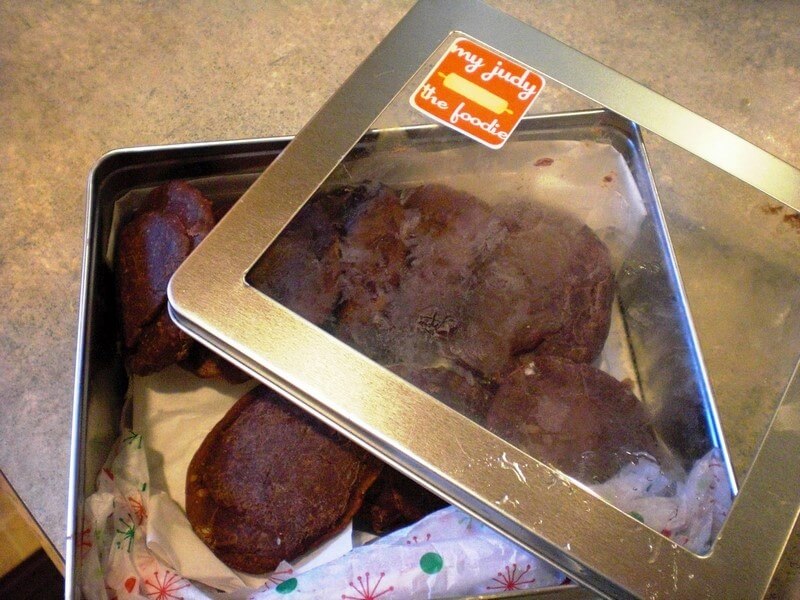
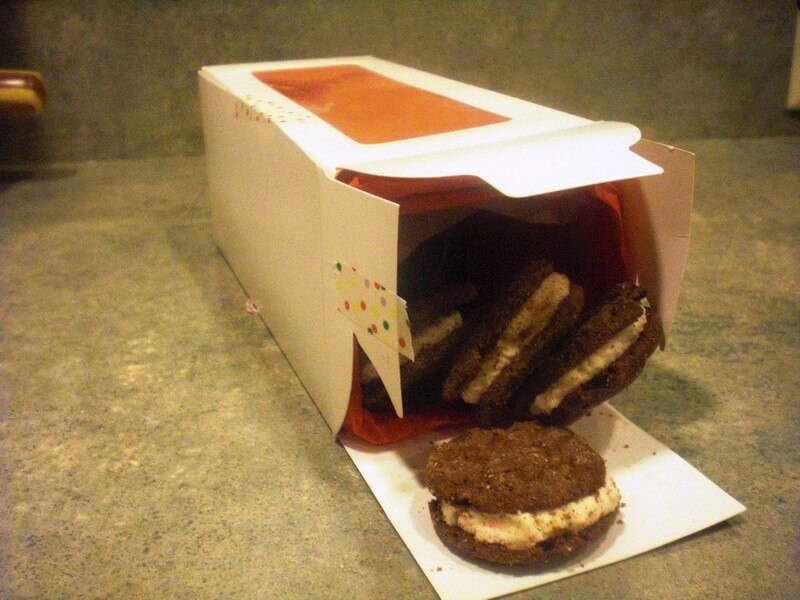
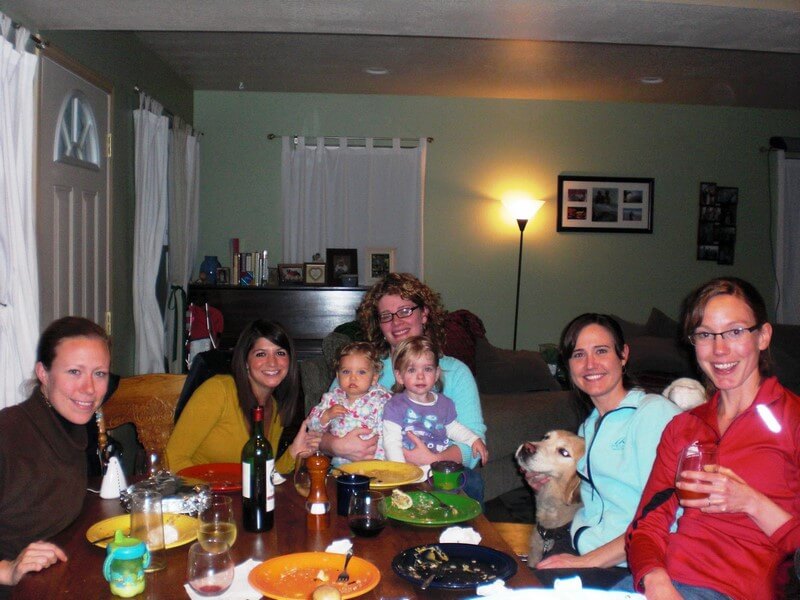
And did I mention one of these new friends of mine, Amber, hosted a cookie exchange party?  That's a sure way to get to my heart.  Nine women means nine different kinds of cookies.  Oh, how we've been buzzing around on a sugar high since Saturday night!


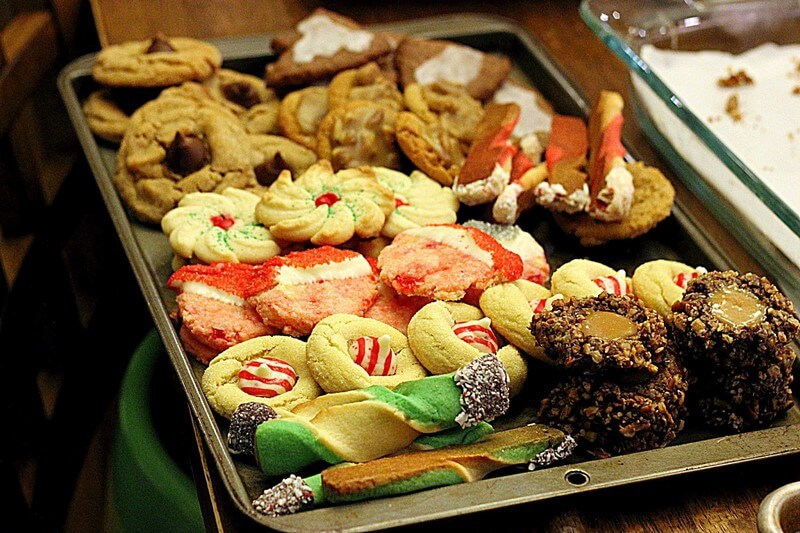
I also got to learn how to frost cookies using royal icing, and I am totally hooked.  This icing makes gorgeous cookies!  Thanks for the intro Dawn!


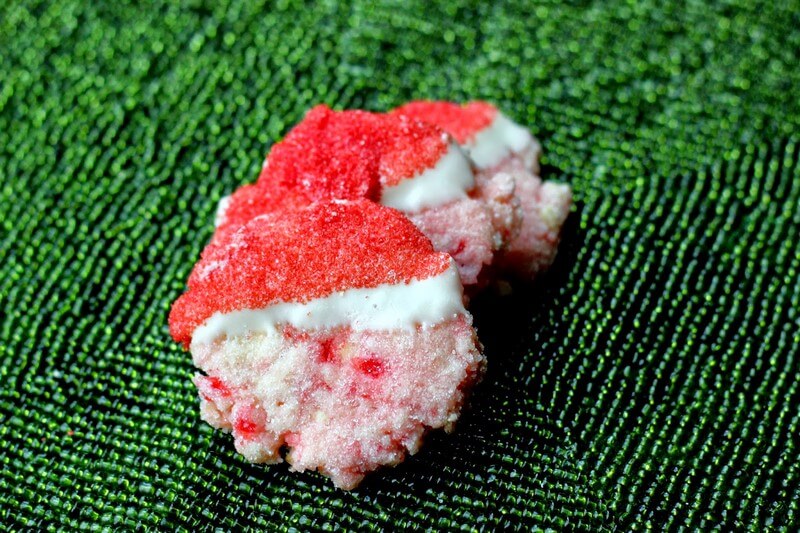
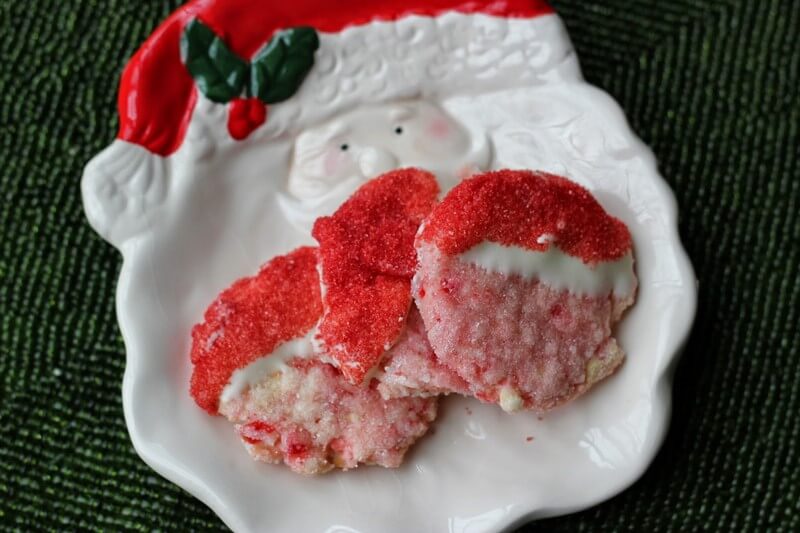
And I got to try an awesome new cookie recipe to bring to the party.  This one will be added into my holiday repertoire from now on.  Cherry shortbread dipped in white chocolate.  Oh my!  Although, the finished product looked a little bit like a Santa with a hat but no facial features, so I can't decide if they are cute or creepy. Thoughts?


Life is good.  God is good.  My heart is full.  I am blessed this holiday season beyond measure.

PRINT THIS RECIPE!

White Chocolate Dipped Cherry Shortbread
Adapted from BHG

Makes 30 cookies

1/2 cup maraschino cherries, drained and chopped finely
2 1/2 cups (350 grams) all-purpose flour
1/2 cup (100 grams) sugar, plus 1/2 cup extra for rolling
1/2 teaspoon kosher salt
1 cup (2 sticks) cold unsalted butter, chopped into 1/4" pieces
12 ounces white chocolate, chopped finely
1/2 teaspoon almond extract
Colored sugars or nonpareils for decorating

Preheat oven to 325F.

Spread cherries on a layer of paper towels.  Place another paper towel on top and press lightly to absorb excess moisture.  Set aside.

In the bowl of a stand mixer fitted with the paddle attachment, or in a large bowl, combine flour, sugar and salt and mix briefly to combine.  Add cold butter and mix on medium-low, or use a pastry blender, until the dough resembles coarse meal.  Add cherries, 4 ounces (2/3 cup) of the chocolate and the almond extract.  Knead the mixture with your hands until it comes together and forms a smooth ball.

Form dough into 1 tablespoon balls and then roll in extra sugar to coat.  Place on cookie sheet approximately 2" apart.  Dip the bottom of a drinking glass in the sugar and then flatten each dough ball.  Bake for 10-12 minutes, until centers are set, then set on a wire rack to cool.

Once cookies are completely cooled, melt remaining white chocolate in a microwave safe bowl by cooking for 15 second intervals and stirring after each 15 seconds until completely melted.  Dip half of each cookie into the white chocolate, then dip in colored sugar or nonpareils for decoration. Lay on parchment paper to dry and harden completely.  Then, you should definitely...

EAT IT!


Tuesday, September 16, 2014

Brown Butter Chocolate Chip Cookies


These cookies, my friends, are my most requested recipe.  And, until now, I have selfishly held it very close to me.

I have made these cookies with brown butter and regular melted butter, and both ways are very good.The brown butter adds a depth of flavor to these cookies that makes them irresistible.  The melted butter makes them taste almost pastry-like.  You can't go wrong either way, but since I am a brown butter fiend, I almost always opt for that.

Also, there are oats in these cookies, but I don't consider them an oatmeal cookie, at least not in the traditional sense.  I've added just enough oats to this recipe to give the cookies a chewy texture that is divine. Even if you're not an oatmeal cookie fan, give em a try.  I think you just might fall in love.

I always have a bag of these cookies in my freezer.  Almost every day, after things start going down hill (because this usually happens at some point every day, right?) I sneak away from the girls into a corner of the kitchen (or bathroom, or basement, or bedroom) and gobble one down.  I think of it as my "secret cookie", and always chuckle a bit to myself as I am snarfing it down.  And then, my day is instantly better!  Well, at least for those 46 seconds I am blissfully alone with crumbs falling down the front of my shirt.  Luckily, I've never gotten caught.  Please don't tell...?

Brown Butter Chocolate Chip Cookies

14 tablespoons unsalted butter
3/4 cup (5 1/4 oz) packed brown sugar
1/2 cup (3 1/2 oz) granulated sugar
1 teaspoon kosher salt
2 teaspoons vanilla extract
1 large egg, plus 1 large egg yolk
1 3/4 cups (8 3/4 oz) all-purpose flour
1/2 teaspoon baking soda
3/4 cup (3 oz) old fashioned rolled oats
1 1/4 cups (7 1/2 oz) dark chocolate chopped or chips
3/4 cup nuts, toasted and chopped (optional)

Preheat oven to 375F.

Melt 10 tablespoons butter in a skillet over medium-high heat.  If opting to brown the butter, cook, swirling the pan often, until the butter turns a deep golden brown, about 3-4 minutes.  Transfer the butter to a heat proof bowl and then add the remaining 4 tablespoons of butter.  Stir until the butter is completely melted.

Add brown sugar, granulated sugar, salt and vanilla to the butter. Whisk, by hand or on medium-low with the whisk attachment to a stand mixer, until fully incorporated.  Add the egg and egg yolk and whisk until fully incorporated. Let the mixture stand for 3 minutes and then whisk for 30 seconds.  Repeat the process of resting and whisking 2 more times.  At this point the mixture will be smooth, thick and glossy.

In a separate bowl, combine the flour, baking soda and oats and stir to combine.  Using a rubber spatula, add the flour mixture to the butter mixture and stir until just combined.  Stir in the chocolate chips and nuts, if using.

Using a 2 tablespoon cookie scoop, or just eyeballing it, drop dough balls 2 inches apart onto a parchment lined cookie sheet.  Bake until cookies are golden brown and puffy and edges have begun to set but middles are still soft, about 11-13 minutes.  Transfer to a cooling rack, and if you can stand to wait, allow to cool to room temperature.  If not, just go ahead and...

EAT IT!!

Tuesday, September 17, 2013

Raspberry Streusel Bars


Something I love about our new lives is the absolute presence of my husband.  For the past three years he was so engulfed by grad school, that being completely present was, understandably, challenging.  These past couple months, since he started working, he has been 110% present in everything we do.  We get out and do things without a deadline and with total leisure.  We enjoy each other, our children, basking in the indulgence of just being together. Oh, the simple pleasures.

Last weekend we decided to take a family outing to Afton Apple Orchard to pick raspberries and apples.  If you know anything about my eldest, its that this girl loves berries more than almost anything on earth.  Girlfriend would eat them breakfast, lunch and dinner if we could afford it.  So, this was obviously heaven on earth to her.  At first, the price of $4/pint seemed steep to us for pick-your-own raspberries...until we realized that we all likely ate our weight in raspberries while we were picking them.


It was a day that was so hot and humid that it was hard to breathe, but it didn't matter an ounce.  We were together, and we were basking in the hot sweaty glow of our togetherness.

We gorged on raspberries and apples.


There was a petting zoo and we met this guy.

Llamas are hilarious by the way.

And when we got home, I made these delicious raspberry bars.  Actually, delicious doesn't quite capture the essence of these bars.  Amazing, awesome. So. Damn. Good. There is 18 tablespoons of butter in one little 9' x 13" pan.  If that doesn't clear up how good these bars are, then you probably don't know anything about butter (I forgive you)...but you'll still love these bars.


PRINT THIS RECIPE

Raspberry Streusel Bars
Serves 12-15
Adapted from Cooks Illustrated

2 1/2 cups (12 1/2 ounces) all-purpose flour
2/3 cup (4 2/3 ounces) granulated sugar
3/4 teaspoon kosher salt
1 cup (2 sticks) + 2 tablespoons unsalted butter, divided, cut into 1" pieces and softened
1/4 cup packed (1 3/4 ounces) brown sugar
1/2 cup (1 1/2 ounces) old-fashioned rolled oats
1/2 cup pecans, finely chopped
3/4 cup (8 1/2 ounces) raspberry jam
3/4 cup (3 1/2 ounces) fresh raspberries

Adjust oven rack to middle and preheat oven to 375F.  Line 9" x 13" pan with tin foil, allowing it to hang over the edges to easily remove the bars later.  Grease foil and set aside.

Using a stand mixer fitted with the paddle, mix flour, granulated sugar and salt on low speed until combined.  Add the 1 cup of butter a piece at a time, then continue mixing until the mixture resembles wet sand, about 1 to 1 1/2 minutes.

Measure 1 1/4 cups loosely packed flour mixture into a separate medium bowl and set aside.  Dump the rest of the flour mixture into the prepared pan and, using clean hands, firmly and evenly press the mixture into place to cover the bottom of the pan.   Bake until the edges begin to brown, about 14 to 18 minutes.

Meanwhile, add brown sugar, oats and pecans to the reserved flour mixture and stir with a wooden spoon until combined.  Add the remaining 2 tablespoons of butter and work it into the mixture by rubbing it between your fingers until the butter is incorporated.

Combine jam and raspberries in a small bowl and mash gently with a fork until combined but some raspberry pieces remain.

Spread jam mixture evenly over the hot crust.  Sprinkle the streusel topping evenly over the jam, but do not press it into the topping.  Return pan to the oven and bake until the streusel is a deep golden brown and the jam is bubbling, about 22 to 25 minutes.

Allow to cool to room temperature on a wire rack for 1 to 2 hours, then remove the bars from the pan by lifting the overhanging foil.  Cut into squares to serve, and then you most certainly should...

EAT IT!!


Friday, June 22, 2012

60 Years Young (and English Toffee Cookies)

Two Saturdays ago we celebrated this guy:


That's my Dad and he turned 60 this month.  60, and boy has he lived so fully all 60 years of that life.  What an inspiration, and someone I admire to my very core.

My Dad is one awesome dude.  He is first and foremost a family guy.  That is the heart and soul of his being. He is also a giver.  He gives of his time freely and without hesitation.  Along with that, he seems to have an unlimited amount of energy which is infectious and inspires others to give just a little bit more.  He is a writer, a joker, a hard worker, an A+ waffle maker, inspiring, optimistic and absolutely unconditionally loving.  And all of these qualities were highlighted by the 80 guests that showed up for his birthday party to celebrate him!  There were friends from all walks of his life...family, friends that went back to his high school days, former co-workers, neighborhood friends, church friends, friend friends, fellow writers...certainly I am missing some.  There was a beautiful toast written by my sister that brought tears to everyone's eyes.  The whole day  was a complete joy.

Oh, and there were cookies.  Lots and lots of cookies.  No one likes cookies more than my dad (although my husband and sister are close runner ups), so we had a cookie bar with 4 different kinds of cookies baked by my niece Paige, my sister Tessa and yours truly.  We made Peanut Butter, White Chocolate Macadamia Nut, Brown Butter Chocolate Chip, and Toffee cookies.  They were all delicious and perfect for the occasion, but the Toffee cookies were the ones that received the highest compliments.  Before I share the recipe, here are a few photos my dad doing what he does best...enjoying and loving his fam.

Photo credit: A Better Story Studios


I love you Dad!  So glad I could celebrate #60 with you!!


English Toffee Cookies
Adapted from Cookin' Canuck

Makes about 3 dozen

2 1/2 cups (350 grams) all-purpose flour
1/2 teaspoon baking powder
3/4 teaspoon kosher salt
1 1/2 cups (310 grams) granulated sugar, plus 1/2 cup for rolling dough
14 tablespoons (195 grams) unsalted butter, softened
2 eggs
2 teaspoons vanilla
1 cup Heath bits

Preheat oven to 350F.

Whisk together the flour, baking soda and salt in a medium bowl.

In a stand mixer fitted with the paddle attachment, add butter and 1 1/2 cups sugar.  On medium speed, beat for 5-7 minutes, or until the mixture is very light and fluffy.  Beat the eggs in one at a time, fully incorporating after each addition.  Add vanilla and mix on medium speed until thoroughly combined.

Turn the mixer to low and add the flour mixture 1/3 at a time, mixing until just combined after each addition.  Add the heath bits and mix on low for another 30 seconds, or until the bits are thoroughly incorporated.

Place additional 1/2 cup of sugar in a shallow bowl.  Roll the dough into 2 tablespoon sized balls and roll in the sugar.  Place dough balls on a cookie sheet lined with parchment paper about 1 inch apart.  Bake on middle rack of the oven for 14-16 minutes, or until lightly golden brown around the edges and slightly puffy in the middle.  Allow to cool on pan for 5 minutes then remove to a wire cooling rack.  These are amazing warm, right out of the oven, so next you should definitely...

Eat it!!


Tuesday, February 14, 2012

This Guy...

Anyone out there think they have the best husband in the whole wide world?

Ah, sorry ladies and gentlemen.  You're wrong!  I snagged him up before any of you could.  Ha ha! Lucky me!  He's mine, all mine.

He's this guy...


He's also this guy...


And this guy...


He's also the guy that shovels the snow, mows the lawn, eats all the cookies (true story) and does ALL the driving (even that 18 hour road trip from Montana to Minnesota.  All.)  He goes to grad school full time, serves as a 2nd Lieutenant with the National Guard, hangs with Anna during the day while I work, often has dinner cooking when I get home and still manages to find time to snuggle up with me and have a glass of wine at the end of the day.

He's sweet, he's funny, he is compassionate, handsome, adorable, clever, hardworking and laughs so infectiously that it would make Oscar the Grouch smile.

He is the most amazing dad to Anna.  Man, those two are a pair.  My heart aches with joy and pride when I watch them together.  He is impossibly patient with her.  He teaches, he guides, he keeps her safe, keeps her smiling.

He is my best friend in the whole wide world.  I still get butterflies in my stomach when he calls me.  I cannot wait to get home at the end of the day and wrap myself up in his arms.  I know how lucky I am...I do.

So, even though we've never been big Valentine's Day celebrants, this is my love letter to you, today and everyday.  You are an amazing man Mace and I am honored to be married to you. Thank you for picking me.

As a tribute to my darlin' and Valentine's Day, I present to you these awesome heart healthy cookies.  I found these on Amy's blog over at Gastronome Tart and fell in love.  Still love you more Mace, but these are pretty darn good.


Oatmeal Quinoa (Heart) Cookie
Adapted from Gastronome Tart

Makes one giant heart cookie (or 12 regular cookies)

1/2 cup pecans
1 1/2 cups rolled oats
1/2 cup quinoa, cooked
1/2 cup dried cranberries
1 tsp vanilla
1/4 cup honey
2 egg whites
1/4 tsp kosher salt

Preheat oven to 350F.  Toast pecans for 4-5 minutes or until lightly brown and fragrant.  Cool slightly then roughly chop.

Add pecans, oats, quinoa, cranberries, vanilla and honey in a large bowl, stirring to combine.  Whisk the egg whites and salt in a small bowl until foamy and then pour over oat mixture, stirring to thoroughly combine.

Scoop entire mixture onto a parchment lined baking sheet and shape into a large heart. Alternatively, scoop handfuls out and form into large balls and place on cookie sheet.

Bake for 18-20 minutes or until golden brown.  Cut into pieces and...

Eat it!!


Thursday, December 15, 2011

Pecan Vanilla Shortbread


I am beginning to think that I misnamed this blog.  After looking at all the recipes I've posted I am thinking perhaps it should have been Cookie Coo.  Thoughts? 

Well, that's a joke of course (or, maybe not) but, I have been just a little obsessed with cookies recently.  I have only posted a small portion of the cookies I've made...so please hold onto those pants with the elastic waist a little longer, you know the ones.  I'm not quite finished with my cookie gluttony.

These shortbread cookies have been a favorite of mine for years now.  They are super simple and super tasty.  Plus they have real vanilla bean beat into the dough.  Anything that uses a real life vanilla bean gets an A+ from me.  I love the depth of flavor it adds to baked goods and I also love how purdy the black specks look in the dough.  See?


I make this shortbread every year to give away for goodies around the holidays; and I always make extra for myself.  These freeze very well and I usually make enough to last me several months past Christmas.  And the best (or worst?) part?  They taste even better straight out of the freezer so need to unthaw.  Just snatch and snarf!


Jazz these babies up with a little colored sugar and you've got some festive shortbread you can take out on the town. 

PRINT THIS RECIPE!!

Pecan Vanilla Shortbread
Adapted from Food and Wine
Makes Approx 30 cookies

3/4 cup (75 grams) pecans, coarsely chopped
1 1/4 sticks (10 tablespoons) unsalted butter, softened
1/2 cup (55 grams) powdered sugar
1/2 vanilla bean, split lengthwise and seeds scraped
1/2 tsp pure vanilla extract
1/2 tsp kosher salt
1 1/2 cups (210 grams) all purpose flour
1/4 cup sugar in the raw or other coarse sugar
1 egg yolk, lightly beaten

Preheat oven to 350F.  Spread the pecans on a baking sheet and toast for 5-7 minutes or until nuts are lightly browned and fragrant.  Set aside to cool.

In the bowl of a stand mixer fitted with the paddle attachment, beat butter, powdered sugar, vanilla bean and seeds, vanilla extract and salt on medium speed until light and fluffy.  Reduce speed to low and add the flour in three batches until incorporated.  Remove the vanilla bean from the bowl and stir in the pecans.

Transfer dough to plastic wrap and use wrap to help guide and roll the dough into a 1 1/2 inch thick log.  Wrap the log in the plastic and refrigerator the dough for 1 hour and up to 3 days.

Line two baking sheets with parchment paper and set aside near your work area.  Spread raw sugar on a cutting board.  Brush the chilled dough log with the egg yolk and roll in the sugar, using your fingers to coat the log entirely with the sugar.  Slice dough into 1/2 inch rounds and place on prepared baking sheets, approximately 1 inch apart.

Bake the cookies in the 350F oven for 20 minutes or until the edges are lightly golden brown.  Rotate baking sheets halfway through baking if baking two sheets at a time.

Transfer cookies to a wire rack to cool and then...

Eat it!!!


Friday, December 9, 2011

Great Food Blogger Cookie Swap


Goodness!!  This swap was so much fun to participate in!! The 1st annual Great Food Blogger Cookie Swap  was hosted by Lindsay of Love and Olive Oil and Julie of The Little Kitchen.  Their Facebook Page said they had 625 participants.  Wow. 

The premise of this swap was easy.  Each person makes 3 dozen cookies and sends them to the three other bloggers that were assigned to them.  In exchange each person receives 3 dozen cookies from three other bloggers.  What a great way to unite bloggers around the world!  Everyday we get to see the creations our fellow bloggers make, and salivating, wish we could pick that food off the computer screen and eat it.  This swap made blogging come alive.  Blogging in tangible, edible form.  We get to taste each others creations.  Wow. 

All the cookies I received were unbelievable. They were also all cookies that I had never made myself and I am so excited to get my hands on the recipes. Beautiful gorgeous absolutely delicious cookies!!!

The day I received my first package from Shari at My Judy the Foodie, I was so stoked.  Because, who doesn't like to having cookies delivered right to their door?  These cookies were sugar cookie-like with thick chocolate frosting on the top.  Divinity in a cookie.


My second cookies to arrive were these babies sent by Meghan of Stir and Scribble.  They were out of this world.  Chocolate sandwich cookies with peppermint cream.  I wanted to scream they were so good.


I met the FedEx man at the door Friday morning to get my third box from Janet of Food Beautiful.  I ripped into them within seconds of closing the door and found double espresso chocolate cookies.  Janet, do you know how much I love espresso?  How chocolate and coffee are maybe one of my favorite combos in the whole wide world?  These were unreal. 


I kinda feel spoiled rotten. 

So, are you curious what I sent out the door?  Cardamom Butter Cookies.  Yes, Cardamom.  With espresso and chocolate drizzles.  These were the most delightful cookie I have ever had the pleasure of baking.  I had so much fun!  And knowing that three fellow bloggers I have never met were going to be eating them made this process even better.  These cookies were filled to the brim with joy and love from me. 


I will be honest, it was a little stressful finding the perfect cookie to send my fellow blogger friends.  I mean, that's what we do...what if they aren't good enough?  Especially since I got one of my very favorite bloggers Scarletta Bakes as one of my recipients!  This was intimidating, but exciting.  I was up for the challenge.  Then I came across this recipe and my fears were no more. 


I'm not gonna, lie...these cookies are time consuming.  But, they are worth every minute of your time.  They will impress people with their complex mix of spices and flavors.  Plus they're so pretty!  You can't go wrong.


I hope my recipients love eating them as much as I loved making them.

Happy Holidays everyone!

Cardamom Butter Cookies with Chocolate & Espresso Drizzles
Adapted from Gourmet


Makes about 4 dozen


PRINT THIS RECIPE!!


Cookies
  • 3 (420 grams) cups all-purpose flour
  • 1 teaspoon baking powder
  • 3/4 teaspoon salt
  • 1 1/2 teaspoons ground cardamom
  • 1/2 teaspoon ground cinnamon
  • 1/4 teaspoon ground allspice
  • 2 sticks (1 cup) unsalted butter, softened
  • 1 1/4 cups granulated sugar
  • 2 large eggs
  • 1 teaspoon vanilla

Espresso and Chocolate Drizzles
  • 1 teaspoon instant-espresso powder
  • 1 teaspoon vanilla
  • 1 1/2 to 2 tablespoons milk
  • 1 cup (110 grams) powdered sugar
  • 3 oz fine-quality bittersweet chocolate, melted


To make the cookies, whisk together flour and next 5 ingredients (through allspice) in a bowl.  Set aside.

Beat butter and sugar in the bowl of a stand mixer at medium-high speed until fluffy, about 2 minutes.  Beat in eggs and vanilla. Reduce to low speed and add flour mixture until just combined.

Form dough into 2 (12-inch) logs, about 1 1/2 inches in diameter, on their own sheet of plastic wrap. Use the plastic wrap and your hands to help guide the dough and roll, press, and square off sides of logs. Chill logs in refrigerator on a baking sheet until slightly firm, about 1 hour.  Smooth logs with plastic wrap and a hard flat sided object (I used a cookbook) to square off the cookie. Chill logs on baking sheet until firm, about 1 hour (or up to 5 days).

Adjust racks to the upper and lower thirds of the oven.  Preheat oven to 350°F.

Cut dough into 1/4" thick slices from one log and place onto 2 large ungreased baking sheets, 1 inch apart.  Rewrap remaining dough and put back in refrigerator.

Bake cookies, rotating halfway through, until edges are golden brown, 10 to 12 minutes total. Cool on sheets 3 minutes, then transfer to racks to cool completely. Repeat with remaining dough.

To make drizzles, whisk espresso powder, vanilla, and 1 1/2 tablespoons milk until espresso powder is dissolved.  Add powdered sugar and enough additional milk to make a thick pourable icing. Spoon into a sealable plastic bag and snip off a very small (about 1/8") bottom corner, when ready to use.

Spoon melted chocolate into another plastic bag and snip off bottom corner, when ready to use.

Drizzle espresso icing and chocolate over each cookie with a back and forth motion.  Allow drizzles to set on cookies until dry, about 2 hours and...

Eat it!!

Tuesday, December 6, 2011

Chocolate Dipped Peanut Butter Cookies


Do you remember these Perfect Peanut Butter Cookies?  The ones I raved and raved about that were soooo good, the best peanut butter cookie in the history of the universe, yada-yada-yada?  Well, it turns out this it true, but then I decided to make them even better. 

I dipped them in bittersweet chocolate.


I dipped them in bittersweet chocolate and they became the most beautiful cookie to ever grace these lips.   

I dipped them in bittersweet chocolate and they tasted so good I almost cried.

I dipped them in bittersweet chocolate and fell madly in love for the third time in my life...first Mace, then Anna, then Chocolate Dipped Peanut Butter Cookie.

Don't even pretend that you're not going to eat every last one of these when you make them.  I was going to give them away for Christmas treats, but I am not sure they'll make it that long.  Sorry guys!  Merry Christmas anyway? 


J/K.  I'll at least leave you with the recipe so you can make 'em yourselves.  I wouldn't be so mean as to leave you totally hanging, eh? 


Bittersweet Chocolate Dipped PB Cookies

1 batch Perfect Peanut Butter Cookies - Perfect Peanut Butter Cookies recipe can be found here
1 pound (16 oz) HIGH QUALITY bittersweet chocolate (please please please use good chocolate, its what brings these cookies from amazing to extraordinary.)

Line two cookie sheets with parchment paper.

In a microwave proof dish melt the chocolate in 30 second increments, stirring in between.  When chocolate is almost completely melted remove from the microwave and stir with a rubber spatula until smooth. 

Transfer chocolate to a dish wide enough to fit the peanut butter cookies, but narrow enough to have some depth for dipping.  Taking one cookie at a time, dip half of the cookie into the chocolate and then lay carefully on the prepared cookie sheet.  Repeat until the cookie sheets are full.  Chill in the refrigerator for 45 minutes or until the chocolate is set completely.  These can then be stored in an airtight container in the refrigerator or a freezer-safe bag in the freezer. 

But who are you kidding?  If you're anything like me, you're just going to...

Eat it!

Sunday, December 4, 2011

Chocolate Cookies with White Chocolate Mint Drizzle


I get so spittin' mad when a recipe doesn't work out the way its supposed to.  I know I should accept these defeats and try to learn from them.  But usually I just throw a temper tantrum and then throw the food in the garbage.  I hate wasting food, it makes me crazy.  So, when the recipe for these "supposed" chocolate mint cookies, came out tasting like so-so chocolate wafers, said temper tantrum commenced.

But then, out of nowhere, my creative side made an appearance yesterday.  And it told me to melt that gorgeous white chocolate I've had hiding in my pantry, add some peppermint extract to it and drizzle it all over those cookies.  And, BAM!  Before I knew what was happening, these poor excuses of a cookie were transformed into a divine and glorious holiday treat! 

Ugly ducklings...

...transformed to a swan!

You can find the recipe for the cookies here, which I am not going to type out because I didn't change anything from the original except the drizzle.  This difference is that they have you melt plain old chocolate and drizzle it on the cookies, which in my opinion is stupid and boring.  So skip that last paragraph and do this instead...

Peppermint White Chocolate Drizzle

6-8 oz white chocolate
1/8 tsp peppermint extract

Melt 6 oz white chocolate in a glass measuring cup in the microwave for 30 seconds.  Continue heating in 30 second increments, stirring in between, until the chocolate is melted.  Add the peppermint extract stirring quickly.  If the chocolate seizes from the addition of the peppermint extract, add another ounce or two of white chocolate and stir until it is smooth. 

Transfer the white chocolate mixture to a ziploc bag and snip a very small corner to squeeze the chocolate through.  Drizzle in a back and forth motion over completely cooled cookies.  Allow chocolate to harden at room temperature for 1 hour and then...

Eat it!

Thursday, November 10, 2011

Perfect Peanut Butter Cookies


These peanut butter cookies are the epitome of peanut butter cookies.  They were so perfect I don't even know where to begin.  They were the perfect amount of sweet, they were the perfect density, had the perfect amount of give when you bit into them and, well, the perfect size (I made 'em kinda big). 

I can fess up about all the cookies I've been making lately because they were for Mace's birthday.  And since his birthday was Tuesday he's finally gotten all these scrumptious cookies in the mail.  I suspect a lot of them are goners by now, because let's be realistic here, if you had a giant box of cookies staring at you every time you walked in the door, could you just ignore them?  I didn't think so.  Plus, I think the cafeteria food is starting to wear on him.  If I could have sent him some of my falafel and pita bread I would have, but I think cookies were a pretty good stand-in for now.

So, back to these absolutely perfect cookies.  I highly recommend using all-natural peanut butter in these.  Any of the more commercial PBs like Jif or Skippy would be fine, but they have molasses and other sugars added to them so they'll add to the sweetness of the cookie.  And plus, I think this tastes more like a peanut butter cookie rather than a cookie with some peanut butter added to it.  This is the real deal.

Something else I'd like to talk about briefly is weighing ingredients while baking.  I recently bought a digital kitchen scale and it has changed the way I bake.  It is unbelievable the difference in weights 1 cup of flour can be and if you weigh your ingredients you will get more consistent baked goods every time.  I am going to include weights in my baking recipes from now on, whenever possible, but I'll continue doing volume measurements too because I know scales aren't standard in a lot of kitchens.

Now...onto our feature presentation!


Perfect Peanut Butter Cookies

Adapted from flour by Joanne Chang

PRINT THIS RECIPE!

1 cup unsalted butter, softened
1 cup (200 grams) granulated sugar
1 cup (220 grams) brown sugar, packed
2 large eggs
1 tsp pure vanilla extract
1 3/4 cups (455 grams) chunky peanut butter, all-natural is best
2 2/3 cups (375 grams) all-purpose flour
1 tsp baking soda
1 tsp kosher salt

Cream together the butter and sugars on medium speed in a stand mixture fitted with the paddle.  Cream for about 5 minutes or until mixture is light and creamy.  On medium speed, beat in eggs and vanilla until well combined, about 2 minutes.  On low speed, beat in the peanut butter until thoroughly combined, about 2 minutes.

In a medium sized bowl whisk together the flour, baking soda and salt.  On low speed, add to the butter mixture until all ingredients are just combined and dough is evenly mixed.

Ok, now comes the hard part, but you have to do it.  It makes your cookies shine, I promise.  Put the dough in an airtight container and put in the refrigerator for at least 3 hours or overnight. 

Okay, did you really wait at least 3 hours? 

Preheat the oven to 350F.  Drop the cookies in 2 tbsp sized balls onto a baking sheet lined with parchment paper.  Flatten each cookie slightly with the palm of your hand and then make the crisscross pattern on each with the back of a fork. 

Bake for 15-18 minutes or until edges are golden brown and the center is still slightly soft.  Remove from the oven and allow to cool on sheet for 5-10 minutes, then put on wire cooling rack and...

Eat it!

Saturday, October 29, 2011

Pumpkin Chocolate Chip Cookies


I have no idea why, but our local health food store released their coveted recipe for pumpkin chocolate chip cookies.  Maybe they thought people wouldn't actually make them at home (they were wrong, I did), or that they would still profit because people would buy the ingredients there (they were right, I did).  But, whatever their reason for doing this, I am going to hide this recipe in a locked box buried in a secret location, save it on my computer and I am also going to share it on here.  I am doing these things in fear that they will realize their mistake and come ask for their recipe back.  These cookies are that damn good.


My husband loves these cookies more than any cookie on the planet, I am pretty sure.  So, I suspect that we'll have these on hand at all times from now on.  I'm not going to complain about that, because they are almost my favorite cookie on the planet too (but most cookies are my favorite cookies on the planet so these tie).

As cookies go, I whipped these up in about 10 minutes.  But, because of the new trick I recently learned I had to be patient and let them sit in the fridge overnight before I baked them.  (Every time I've written about this I feel incredibly whiny and feel there is nothing to be done about it because its so unfair that I have to wait overnight to eat my cookies!)

I love to bake cookies and freeze them so we always have a quick dessert on hand.  Someone told me recently that its better to freeze the cookie dough and then bake them straight from the freezer. I think this is because you have oven fresh cookies every time, but I'm curious if there's anything more behind this theory.  I decided to do an experiment with these cookies so I put a ball dough in the freezer and an already baked cookie in the freezer.  In a week I am going to bake the dough and defrost the cookie and do a taste test.  This may or may not be a ploy to fit more cookies into my diet, but in any case, stay tuned!  I'll report back next week!


Pumpkin Chocolate Chip Cookies


PRINT THIS RECIPE!


Adapted from Good Food Store recipe

Ingredients

1/2 cup butter, softened
1 1/4 cup sugar
1 egg
3/4 cup canned pumpkin
1 tsp pure vanilla extract
2 cups all-purpose flour
1 tsp baking powder
1 tsp baking soda
1 1/2 tsp cinnamon
1 tsp fresh ground nutmeg
1/2 tsp ground cloves
1/2 tsp salt
1/4 cup (heaping) slivered almonds
3/4 cup semi-sweet chocolate chips
Bittersweet chocolate for drizzling

Directions

In the bowl of a stand mixer beat butter and sugar on medium speed until light and fluffy, about 5 minutes.  Add egg, pumpkin and vanilla extract and beat until combined, about 2 minutes.

In a separate bowl combine flour, baking soda, baking powder, salt and spices.  Gradually add flour to butter mixture on medium speed until just combined.  Stir in the almonds and chocolate chips.

Chill the dough for at least 3 hours, or overnight. 

Preheat over to 350F.

Roll into 2-tablespoon sized balls and place on baking sheet lined with parchment paper.  Bake for 17-20 minutes, rotating the tray halfway through.  Remove from oven and allow to cool completely on wire rack. 

Melt bittersweet chocolate in the microwave until completely melted and smooth.  With a spoon or toothpick, drizzle the chocolate over the cookies and then set aside until the chocolate hardens.

Eat it!

Monday, October 24, 2011

GNIPL and Vegan Cookie Pie

GNIPL - /nip-pull/ - acronym for: Girls Night In Pot Luck; definition 1. a Saturday night when awesome women descend upon a home, scrumptious food in hand to eat their faces off 2. a Saturday night when women descend upon a home and drink wine, talk, dance and laugh their asses off.

This was my Saturday night...GNIPL (acronym coined by my friend Kate).  There is something about girlfriends that can turn your heart and head around in an instant.  I was having a rough weekend, missing my husband something fierce and feeling rammy and cooped up in the house because of the rain.  I felt whole and renewed at the end of the night, albeit tired after calling it a night much later than I am used to.


I am positive that most of the problems in this world could be solved if people sat around and ate amazing food, sipped wine and topped off their night with a decadent dessert...and of course lots of laughter. 


Crispy Kale & Tofu, Falafel, Pumpkin Hummus & Homemade Applesauce

Mmm, mm, mm...lucky me for having such awesome girlfriends/cooks in my life. We ate until there was little chance of fitting anything else into our tummies; and then we ate dessert.


The next day I found myself staring at an enormous bowl of chickpeas, since I had soaked too many from the falafel I made for GNIPL.  Hmm...what could I do with these?  Well, heck, why not make a chocolate chip cookie pie?

Mind you, this was not my idea, but a brilliant idea nonetheless.  I found the recipe here on Chocolate Covered Katie's blog.  You will not believe how good this tastes until you try it yourself.  I brought it into work today and didn't tell a soul what was in it.  It got rave reviews from all...then a bunch of dirty looks when I fessed up.  But...then more raving.  So go ahead and make.  Its "healthy" chocolate chip cookie pie, but so good you'll never miss the flour, butter or eggs.  Go ahead and try it!  I double  triple dog dare you!


Vegan Chocolate Chip Cookie Pie


By Chocolate Covered Katie (minor adaptations made)

Ingredients

2 cans (500 grams) chickpeas, drained and rinsed
1 cup quick cooking oats
1/4 cup applesauce (I used sweetened, and then reduced sugar from original recipe)
3 T canola oil
2 tsp pure vanilla extract
1/2 tsp baking soda
2 tsp baking powder
1/2 tsp salt
1 and 1/4 cups brown sugar 
1 cup chocolate chips

Directions
Preheat oven to 350.  Put all ingredients except chocolate chips in a food processor and blend until very well mixed . Stir in chocolate chips and pour into an oiled springform pan.  Bake for 35 minutes or until well set and pie pulls slightly away from the edge of pan. Let cool 10 minutes on wire rack and then remove from pan.
Eat it!